Dead Pixel Test: How to Check Your Phone or Monitor Screen (Free)
There is a dot on your screen. It was not there last week — or maybe it was and you only just noticed it. Now you cannot stop seeing it.
Before you book a repair, it is worth knowing three things: whether it is actually a pixel fault, which kind of fault it is, and whether the manufacturer will replace the screen for it. The answers are different, and the last one surprises most people.
You do not need an app to do this test. You need a clean screen, full brightness, and about two minutes.
Dead, stuck, or dust — they are not the same thing
People say “dead pixel” for any spot on a screen. But the fixes are completely different, so it matters which one you have.
A dead pixel is always black. It receives no power. On a white screen it is an obvious black dot; on a black screen you cannot see it at all. Dead pixels do not come back. No app, no pressure, no “pixel fixer” video will revive one, because there is nothing to revive — the transistor driving it has failed.
A stuck pixel is always on. It is frozen showing red, green, blue, or white, and it stays that colour no matter what the screen displays. On a black screen it glows like a tiny star. Stuck pixels are sometimes recoverable, because the sub-pixel is still powered — it is just not switching.
Dust and debris are neither. A speck sitting on the glass, or trapped under a screen protector, looks identical to a dead pixel until you clean it. This is genuinely the most common cause of a “dead pixel” that turns out to be nothing. Always clean first — you will feel silly if you skip this and book a repair.
There is also a fourth thing people mistake for pixels: image retention and burn-in on OLED screens. That looks like a faint ghost of a keyboard, a status bar, or a navigation bar, visible on grey or on a uniform colour. It is a whole-panel wear issue, not a single failed pixel, and it is covered differently by warranty.
The test itself
The reason this test works is simple: a faulty pixel only reveals itself against the right background. A dead pixel is invisible on black. A stuck red pixel is invisible on a red screen. So you cycle through backgrounds until every failure mode has had a chance to show itself.
Clean the screen. Dry microfibre cloth. Remove your screen protector if you can — dust loves to sit underneath it.
Go to maximum brightness, and switch off everything that alters colour. Night mode, blue light filters, adaptive brightness, “eye comfort” modes, and dark-mode dimming all change what your pixels output. Any of them can hide a genuine fault or create a fake one.
Now cycle these six full-screen colours, slowly, and scan the whole panel each time — including the corners and the edges near the notch or camera cutout, where faults cluster:
- Black — reveals stuck pixels, which glow against it
- White — reveals dead pixels, which stay black against it
- Red — reveals a failed red sub-pixel
- Green — reveals a failed green sub-pixel
- Blue — reveals a failed blue sub-pixel
- Mid-grey — reveals backlight bleed, blotches, and OLED retention
If you want the colours served up for you rather than hunting for images, our free dead pixel test runs all ten patterns full-screen in the browser, one tap each, and tells you at the end what the pattern of faults you marked most likely means. It works on a phone, a tablet, or a desktop monitor, and nothing leaves your device.
Green is the one to look at hardest. Human eyes are most sensitive to green, and green sub-pixels carry the largest share of perceived brightness, so a green fault is the most visible in everyday use.
Hold the phone at your normal viewing distance first, then closer. A pixel you can only see with your nose against the glass is a real fault but is very unlikely to meet a warranty threshold — and honestly, once you stop hunting for it, you will stop seeing it.
Why your phone cannot find dead pixels for you
This is worth being blunt about, because plenty of apps imply otherwise.
A phone cannot inspect its own screen. There is no sensor pointed at the display. The operating system knows what it sent to the panel, not what the panel actually lit up. When a pixel dies, the software has no idea — it keeps sending the same data, and the hardware silently fails to show it.
So any tool that claims to automatically detect dead pixels on the device it is running on is not measuring anything. All it can honestly do is what you are doing here: show you the colours and let your eye be the detector.
That is a real limitation, not a missing feature. Be suspicious of any app that gives you a “screen health score” out of 100, because there is nothing on the device capable of producing that number.
What we learned building this into DeviceGPT
We shipped a screen test in DeviceGPT 3.1.18, and the honest constraint above shaped the whole design. The app leads with it in plain words rather than hiding it:
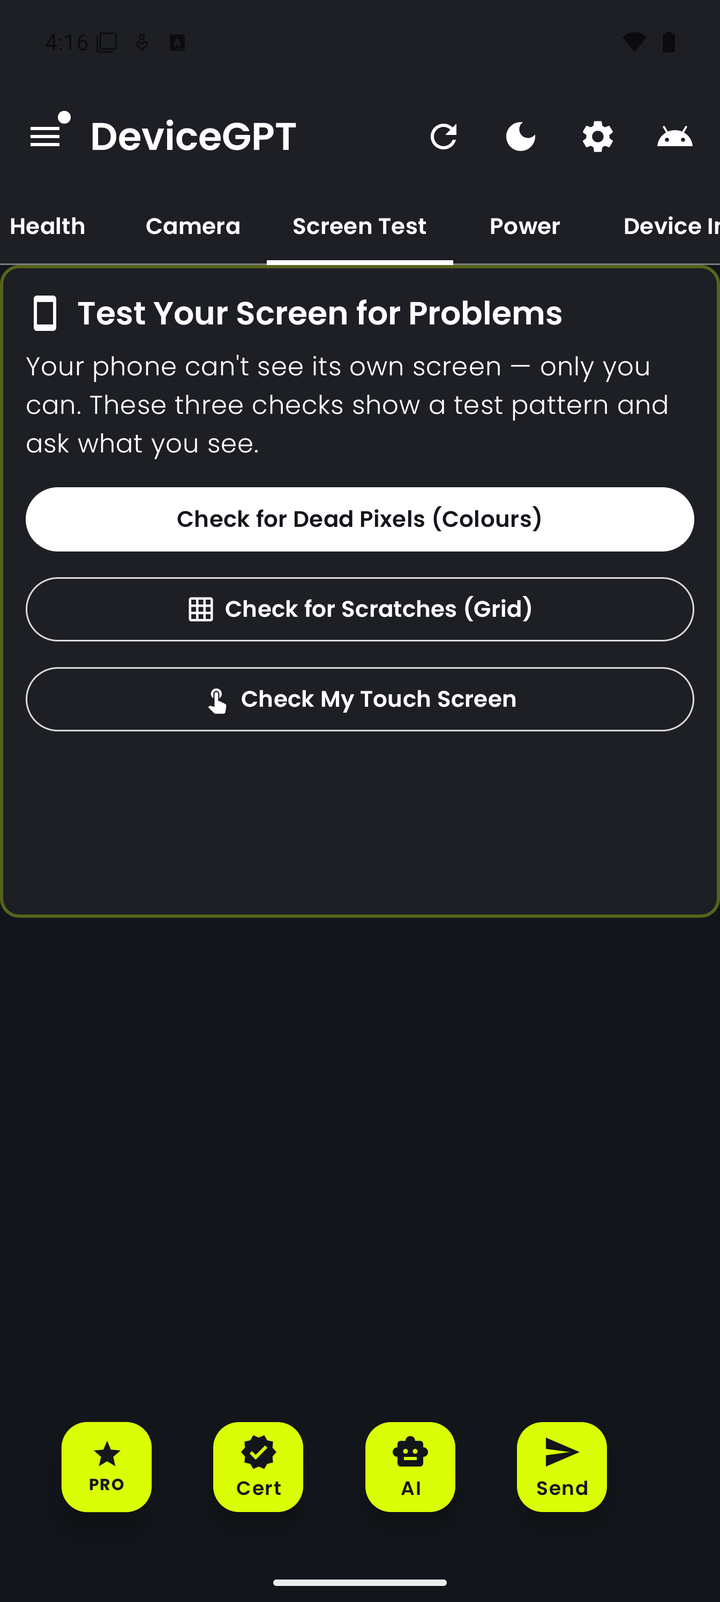
Three things turned out to matter more than we expected, and they are worth copying whether you use an app or not.
The system bars have to go. Our first build drew the colour fill inside the normal app window, which leaves the status bar at the top and the gesture bar at the bottom showing their own content. Those strips cover real pixels — including the region around the notch and the bottom edge, which is exactly where panel faults tend to cluster. The shipped version hides the system bars for the duration of the test so the fill genuinely reaches every edge. If you are testing manually in a browser instead, use full-screen mode for the same reason.
Six colours is not quite enough. We started with the classic set — red, green, blue, white, black, grey. We ended up shipping nine, adding cyan, magenta, and yellow. Those three are each a pair of sub-pixels lit together, and a partly-failed sub-pixel sometimes shows up on a combination when it looked fine on the pure primary. It costs three extra taps and catches faults the six-colour set misses.
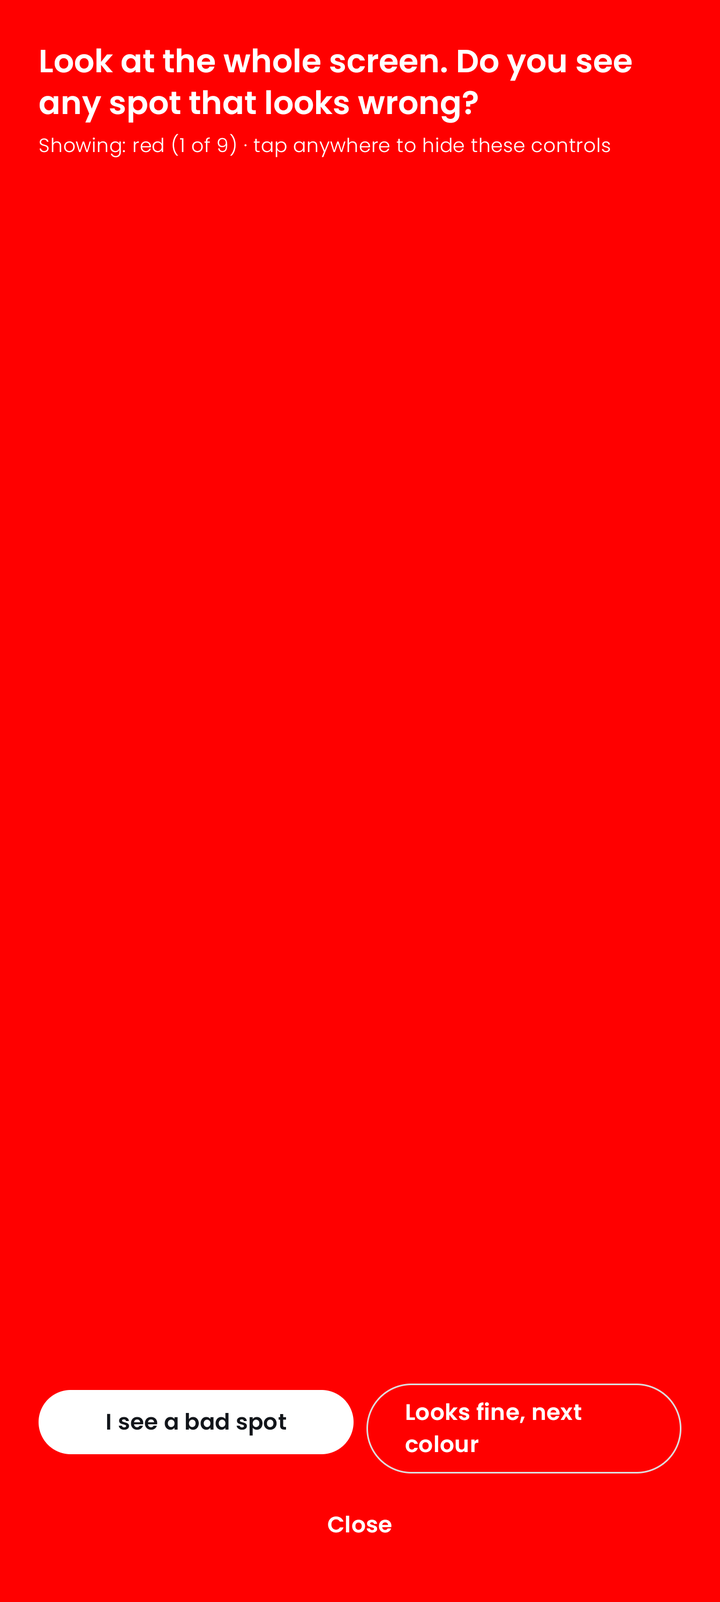
The app must ask, not assert. Every screen ends with the same two options — I see a bad spot or Looks fine, next colour. The app records your answer. It never claims to have found anything itself, because it cannot. That is the only defensible way to build this, and it is the line most “dead pixel detector” apps quietly cross.
We also added a grid pattern check, which was not in the original plan. A fine scratch in the glass is nearly invisible on a solid fill but shows up clearly as a break in a regular thin-line grid — different fault, different pattern, and easy to include once the full-screen plumbing exists.
Can a stuck pixel be fixed?
Sometimes — and only a stuck one, never a dead one.
The method that occasionally works is rapid colour cycling: flashing the area through colours very fast for 10 to 30 minutes, which can jolt a stuck sub-pixel back into switching. It is not magic and it is not reliable. It works on some stuck pixels and does nothing to most.
The other method you will find online is pressure — pressing the spot with a soft cloth over a switched-off screen. This one genuinely can work, and it can also permanently damage your display, spread the fault, or crack the digitiser. On a modern phone with a bonded OLED panel, I would not do it. The upside is one pixel; the downside is the whole screen.
If colour cycling does not fix it in about half an hour, it will not fix it.
What warranty actually covers (the part people get wrong)
Almost every manufacturer has a dead pixel policy, and almost nobody reads it before getting angry at a support agent.
The short version: one dead pixel is usually not enough. Panel manufacturing has an accepted defect rate, and warranties are written around it. Most policies require a minimum number of faulty pixels before the screen qualifies for replacement, and that threshold varies by brand, by panel size, and sometimes by where on the screen the fault sits — a fault in the centre is often treated more seriously than one in a corner.
Some brands are stricter than others. Some premium and professional-monitor lines advertise a zero-bright-pixel guarantee. Budget panels frequently allow several.
Two practical points:
Check within the return window, not the warranty window. A brand-new device you can simply return. That is a much easier path than a warranty claim, and it closes fast — often 14 to 30 days. Test a new phone, tablet, or monitor on day one, not day sixty.
Document it. Photograph the fault against a white screen and a black screen, with the date. If you need to escalate, “there is a dot” is weak; a dated photo showing a black pixel on a pure white field is not.
Testing the touchscreen while you are at it
A dead pixel and a dead touch zone are unrelated faults, but they get reported together often enough that it is worth checking both in one sitting — especially after a drop or a screen replacement.
Drag one finger slowly across the whole screen in overlapping horizontal lines, like mowing a lawn, then again vertically. You are looking for any region where the line breaks, jumps, or stops following your finger. Pay attention to the edges: after a repair, edge digitiser response is the first thing to go, and it is exactly where your keyboard’s outer keys and your back gesture live.
If a zone is dead to touch but the pixels there display fine, that is a digitiser fault, not a display fault — different part, different repair, and worth saying clearly when you book it.
A sensible order to do all of this
If you are checking a phone you already own, or one you are about to buy secondhand, this order wastes the least time:
- Clean the screen and remove the protector
- Max brightness, colour filters off
- Black → white → red → green → blue → grey
- Grey again, looking specifically for ghosting and blotches
- Finger-drag the full surface for touch dead zones
- Photograph anything you find, with the date
Two minutes, no cost, and you walk into the shop knowing exactly what is wrong instead of hoping they tell you honestly.
Checking the rest of the hardware
A screen fault rarely arrives alone on a phone that has been dropped or water-damaged. If you are already testing, it is worth checking the parts that fail quietly — battery health, microphone, speakers, sensors, and charging behaviour — because those degrade without any visible symptom at all.
DeviceGPT is a free Android app that runs those hardware and battery checks and explains the results in plain language, without root. It reports what Android actually exposes and tells you when a value is not available — which, for anything screen-related, is the honest answer more often than app stores would suggest.
Screenshots in this article are from DeviceGPT 3.1.18 on Android 15. The screen test described here is built by the Teamz Lab team; the technique itself works on any device with any full-screen colour tool, and nothing above requires our app.
Have a project in mind?